So I finally got around to building the deck I want on the back of my house.
I have done quite a bit of basic framing in the past, and I have years of residential building design under my belt, so I knew I could handle the design and build myself. With a general idea of what I wanted to build, I hopped into SketchUp to figure exactly what I needed to do to make this idea a reality.
My goal with my SketchUp model was to satisfy three requirements:
Optimize material usage so I had little to no wasted material
Get as close to exact material count as possible
Generate plans that I could send to the building department for permitting
With that in mind, I started modeling. To start, I threw a basic deck size/shape on the back of an existing model I had of my house (I am going to go out on a limb and say that I believe that MOST SketchUp users have some kind of a model of wherever they live... if not... that should probably be your next project). This created some very basic dimensions and rough location of the deck.
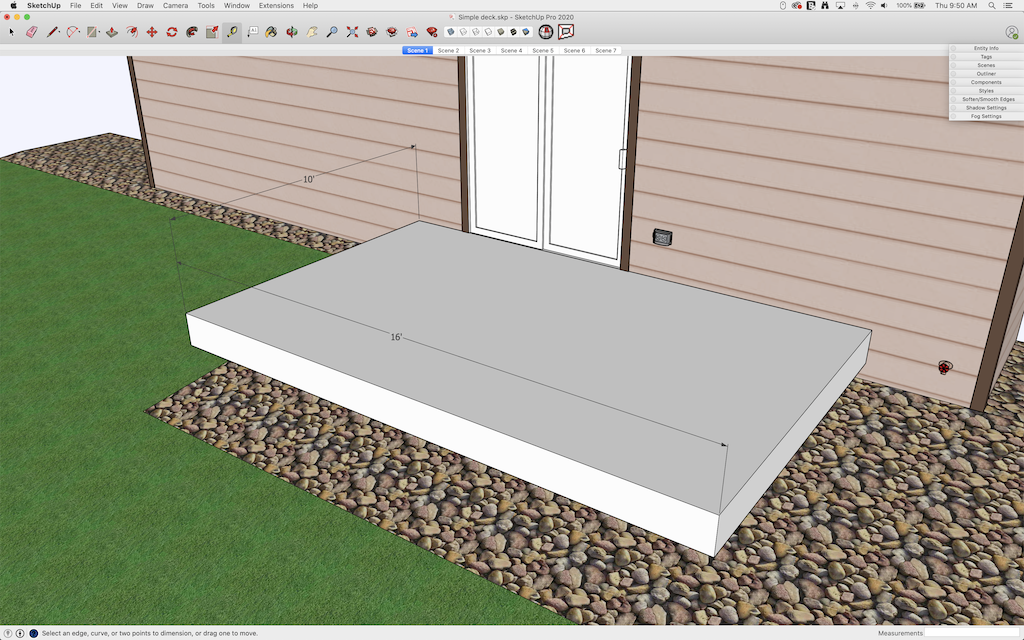
From the model, it looked like about 16 feet wide and 10 feet deep would work. With that in mind, I started looking into materials. First I needed to know how deep my deck material would be. With the help of an online span calculator, I found that 2x8s should work fine for my joists. Next step was to see what I could actually get my hands on, so I searched online to see what could be delivered that was at least 2x8' and pressure treated (a requirement for exterior framing).
I was able to find 2x8s in both 10' and 16' lengths at my local store! If I did this right, I could build the entire frame of my deck with little to no cutting! Better make sure, though... time to head back into SketchUp and model up a few joist components!
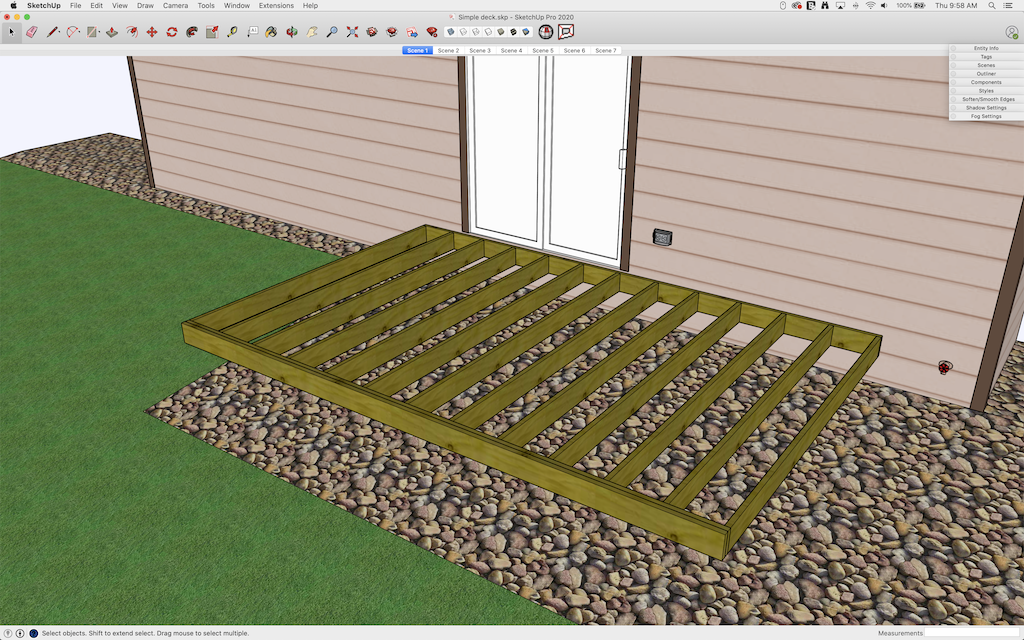
Alright! While this did make my deck slightly longer at 10'4 1/2" (10' joist with 1 1/2" ledger and double 1 1/2" beam), I could build the whole thing without worrying about cutting any of the 2x8s!
Now, I needed to get some support in there. Again, thanks to the span charts, I knew that I would need four posts holding up that beam. So, next up, modeling those.
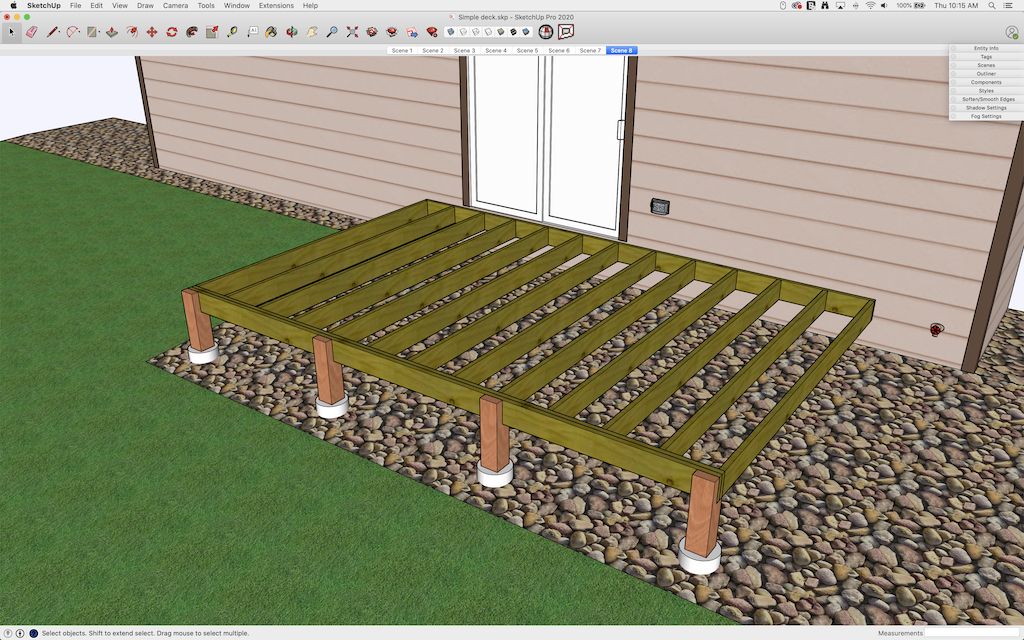
Nice! With this, I was able to confirm that I could order a single 6x6" wide, 10' long beam for all four posts! Armed with this information, I could now figure out where the caissons would need to be placed! Based on local building requirements, I knew the caissons would need to be 30" deep and extend 6" above grade. How much concrete would I need? How do I even calculate the volume of a cylinder? I have no idea... but with SketchUp, I modeled a 10" circle, used Push/Pull to make it 36" long, then grouped it, and selected it to determine the amount of concrete needed!
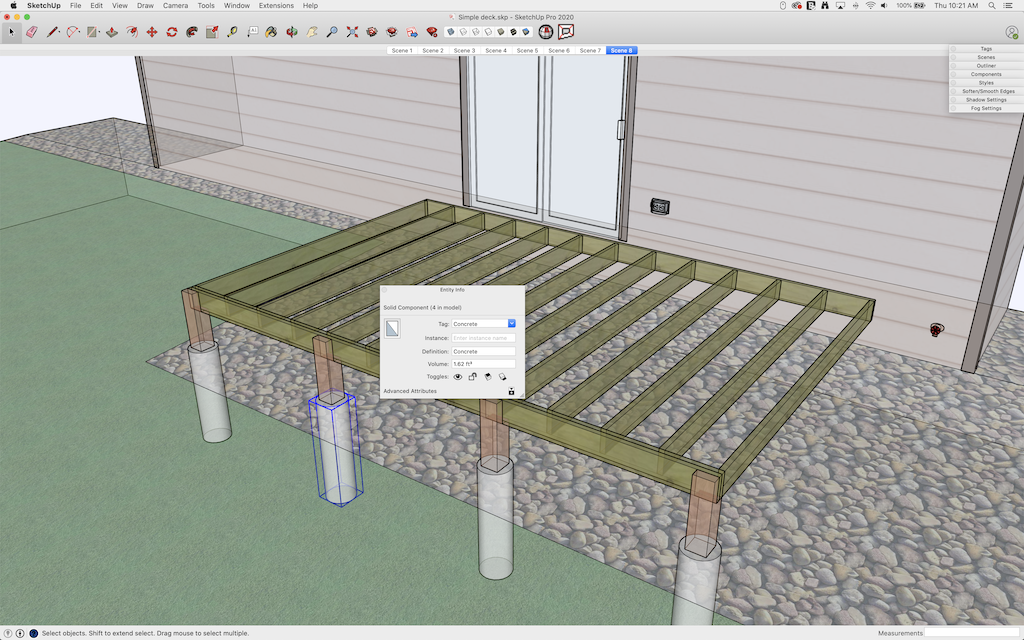
So, thanks to SketchUp, I knew I would need four caissons at 1.62 cubic feet each. Now I could order just the right amount of concrete! Speaking of ordering materials, one of the expenses that always surprises me on a project like this, is the hardware. I decided that I did not want to be running back and forth to the store while working on this project - better get it right from the start! I set out to model not only the hangers, lag bolts, and bolts I would need, but would also model - and count - all the nails and screws!
Hangers were easy, as I was able to find models for the joist hangers and the column bases on 3D Warehouse. If you have not already, you should check out Simpson Strongtie's models. They are awesome!
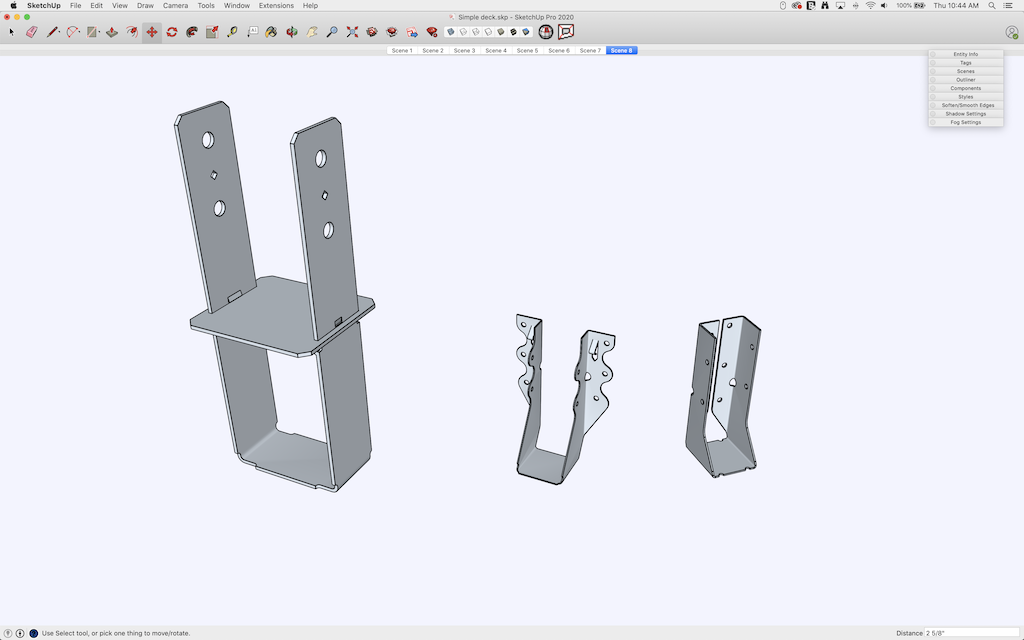
Next, I added bolt components. I didn't bother modeling the threads, or even the shafts of the lag bolts that were going into the ledger. All I needed was to add an extruded hexagon so I could figure location and count components (no need to add a bunch of detail, then bury it in another component). I did the same for the nuts and bolts that connected the beam to the posts.
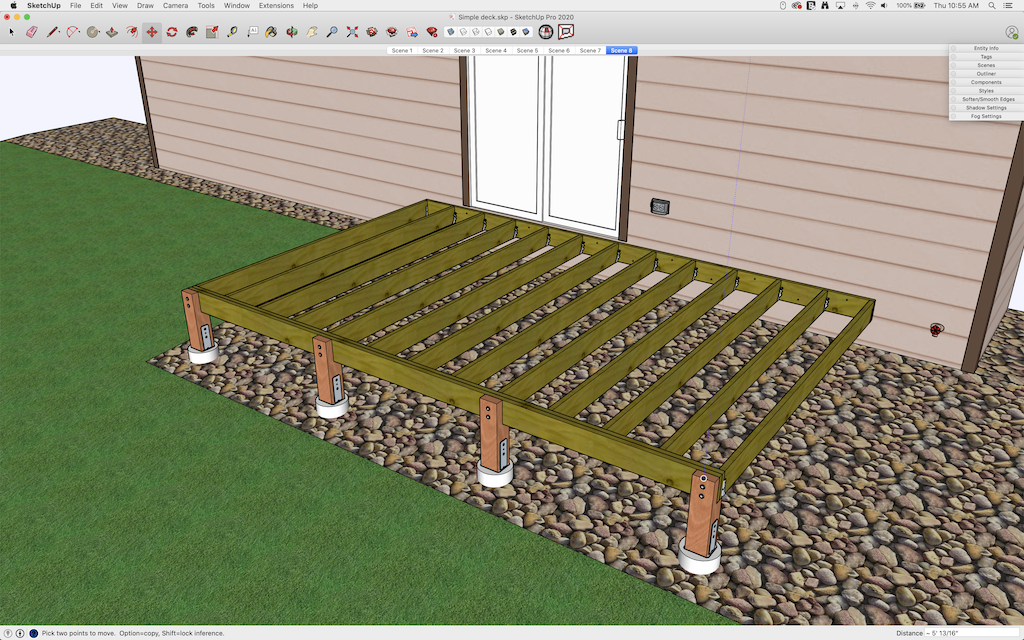
This was going great! At this point I could get an exact count of bolts, nuts, washers, joist hangers, and post bases just by selecting them and looking at Entity Info, or running a quick Generate Report.
This quick modeling addition had another perk! As I spun around the model, I noticed that the nuts and bolts for the posts were interfering with the joists - lucky catch.
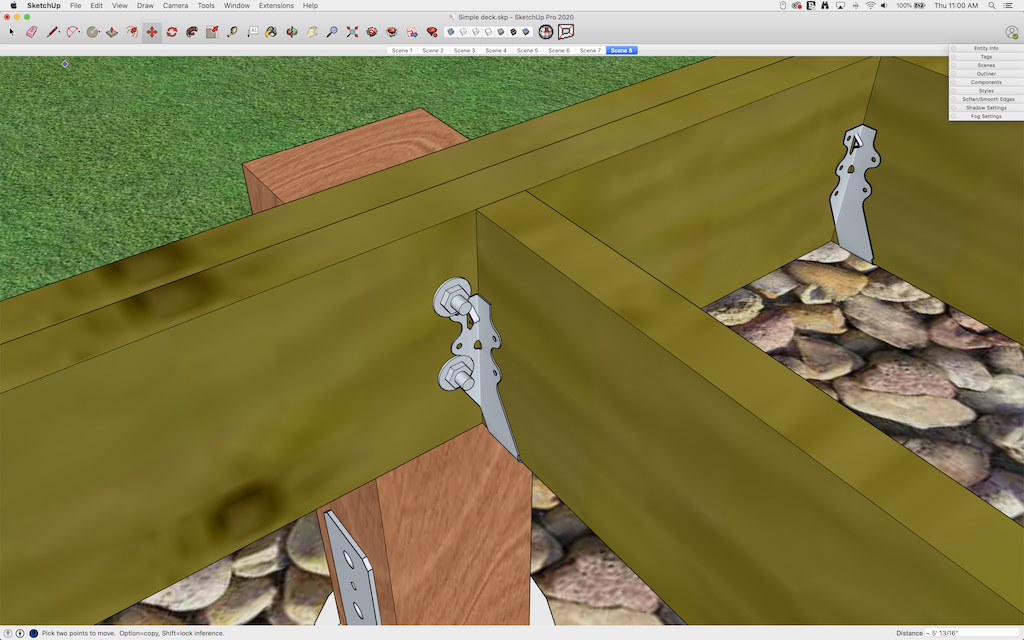
Fortunately, at this point I had not placed a hanger, or ordered materials, or even submitted for my building permit! The solution was simple enough though, I could either move the columns a few inches, or I could move the joists. In the end, I ended up moving the joists. By moving the whole array 8" over, I did have to add another joist, but that seemed better than having oddly spaced posts... after all, you see the posts, but not the joists.
To finalize my hardware list, I made a quick component that consisted of four 1.5" nails, and two 3" nails, and placed one on the end of each joist. This would give me the number of nails needed to connect the joists to their hangers.
The final step of the deck was to add the actual decking. Initially, I planned to order 8' decking and to stagger cuts over the joists. In the end, though, my design to cut as little as possible won over the general goal of ordering the cheapest materials, and I ended up placing 16' composite decking boards onto the whole thing. No cutting needed!
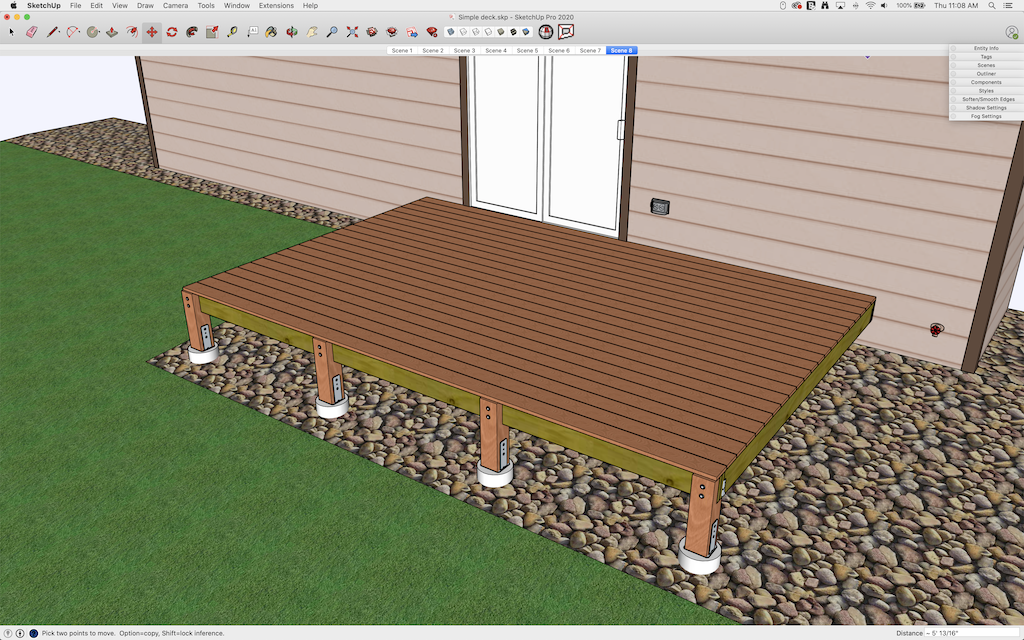
This was really coming together! I added two more components to the model before I finished: one was a set of nails at the bottom of the posts to connect it to the base, and another that allowed me to count the clips to attach the decking to the joists!
A quick Generate Report at this point gave me a complete materials list, down to the nail, that I would need to build my deck!
So far, I had satisfied two requirements-
Optimize material usage so I had little to no wasted material
Get as close to exact material count as possible
Now, I just had to to knock out the final material count and generate plans to submit to the city - not hard at all. I knew that I wanted an overhead view of the framing with dimensions, a side view of a caisson showing the depth above and below grade, an image detailing the ledger connections and joist hangers, and another above view with the decking.
To get these views, I created a scene for each, and where necessary I added a Section Plane to remove geometry that was in the way.
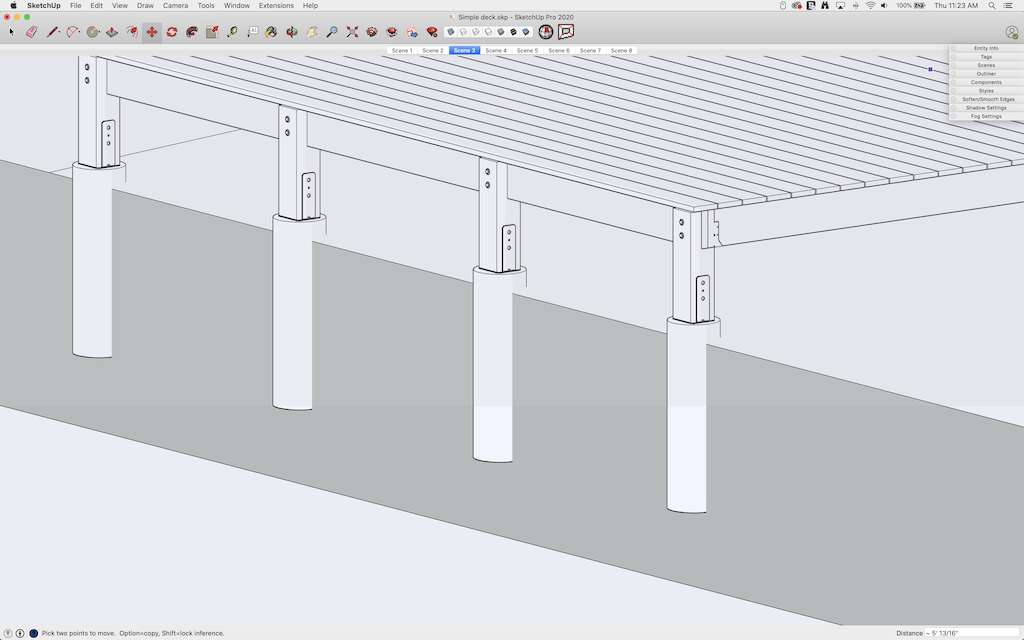
With these scenes created, I hopped into LayOut and put each on it's own page (with a pretty isometric vide for the cover). All that was left was to add some text and a few dimensions, and I had a simple but informative set of plans, ready to be submitted to the city. All I needed to do now was export the model to a PDF and email them!
Over all, this was a great design project and turned out to be a straightforward build. Could I have hand drawn some plans and calculated the materials I thought I would need? Probably. I do know, however, that if I had done that I would have been short on lumber and connectors, and would probably have had too much concrete and decking.
A few hours in SketchUp probably saved me a few hundred dollars in material and more than one installation headache!